Uploading a File to Subtitle
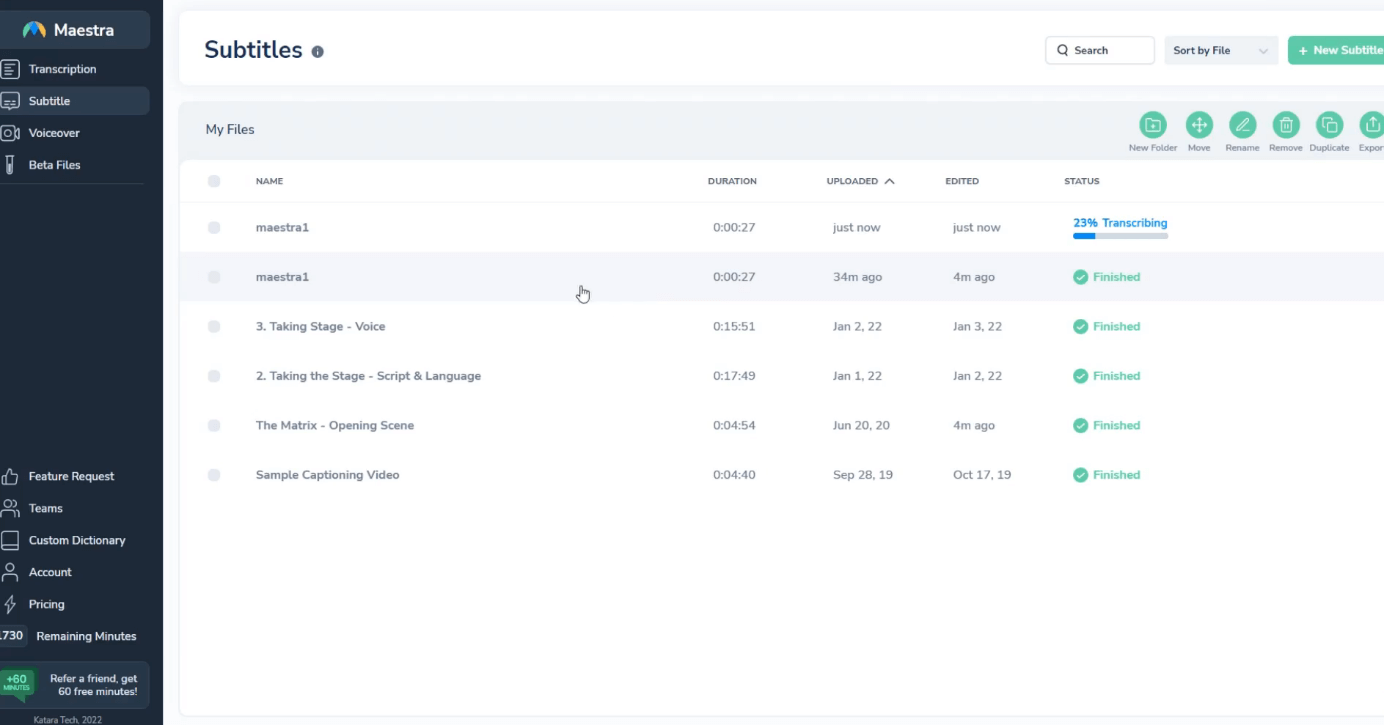
After logging in to their accounts, users will be met with their dashboard. On the upper left corner, you can select “Subtitle” to go to the “Subtitles” section. Then, click “New Subtitle” on the upper right corner of their screen to start uploading.

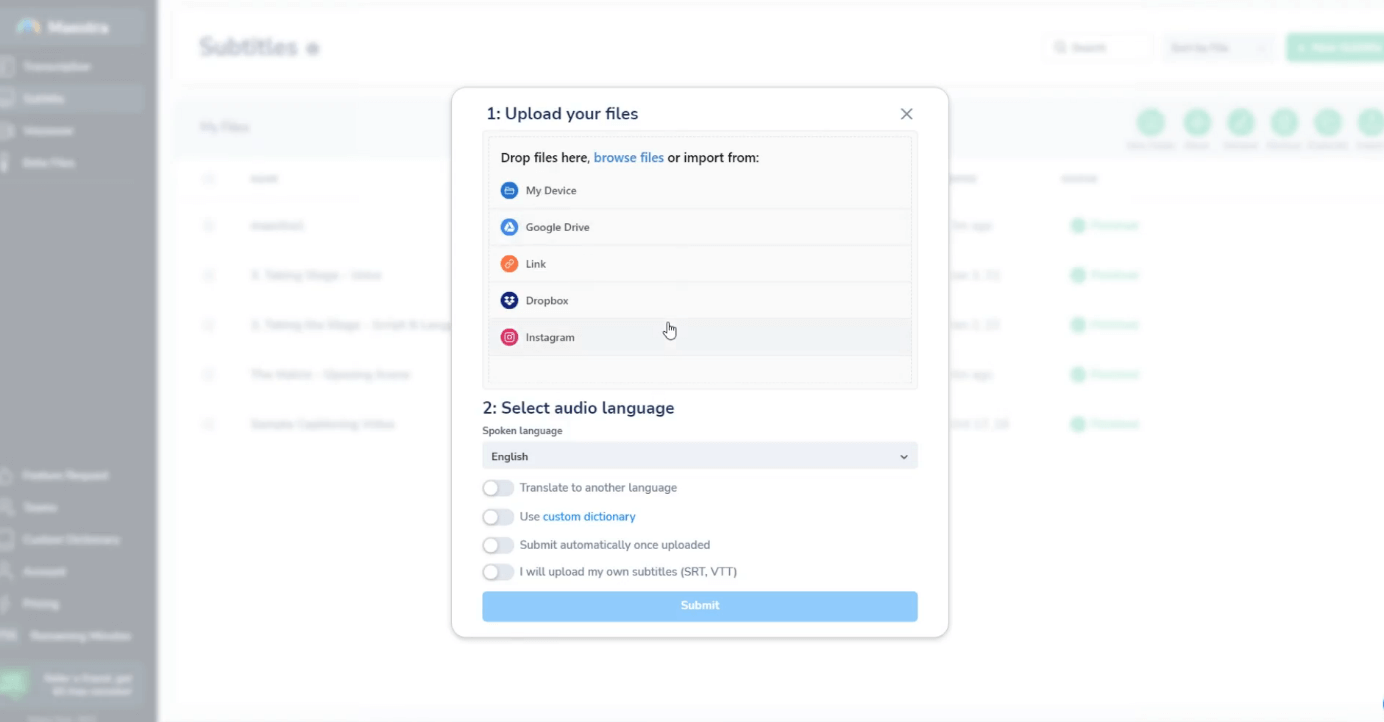
The upload window will pop up, showing you different ways of uploading a file to Maestra’s cloud. Users can upload from Instagram, Dropbox, Google Drive, Zoom and more. Alternatively, you can choose a file from your directory or drag it into the upload window to start uploading the file.
Then you need to select the original language of the file and the language you wish to translate to. Or you can upload your own subtitles if you choose to do so.
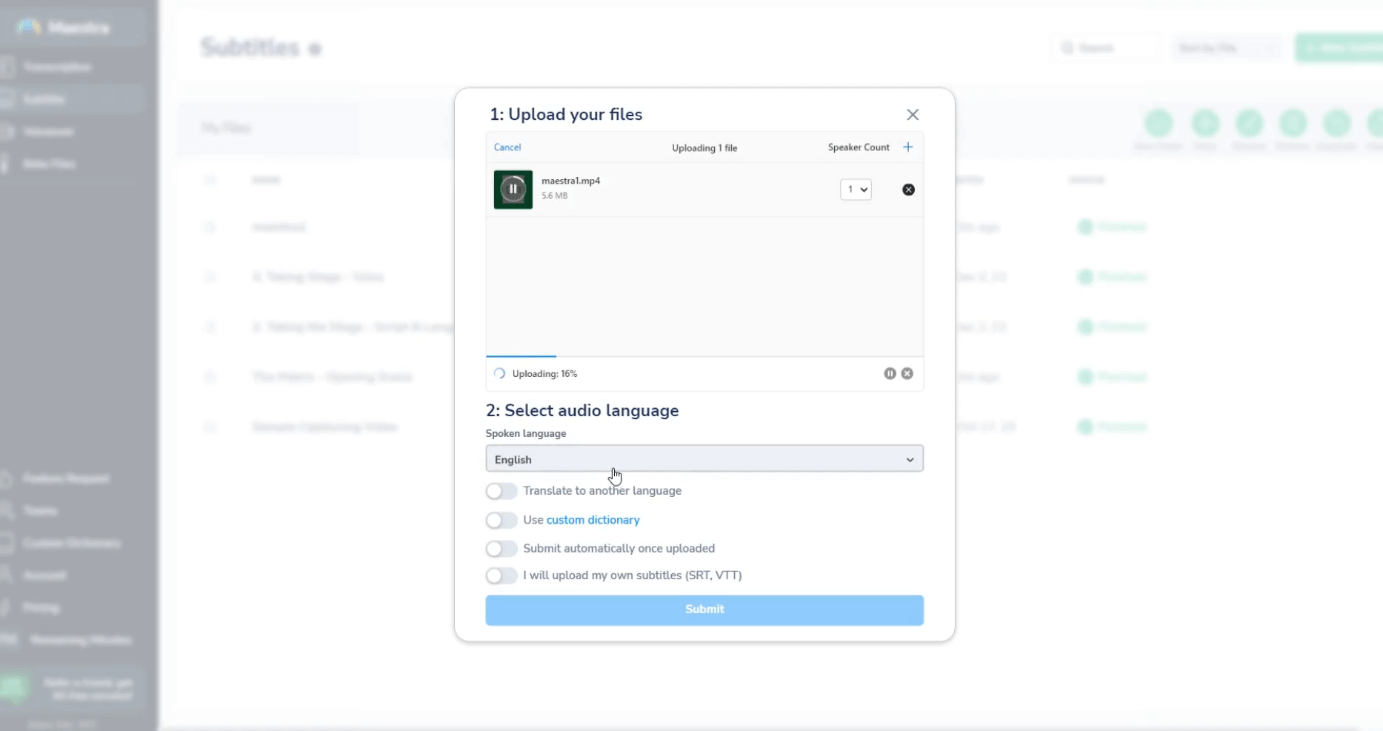
Before the upload, you can choose the number of speakers in the file to allow the software assign different speakers. If you wish, you can click “Submit automatically once uploaded” or manually click "Submit" once the uploading is finished.
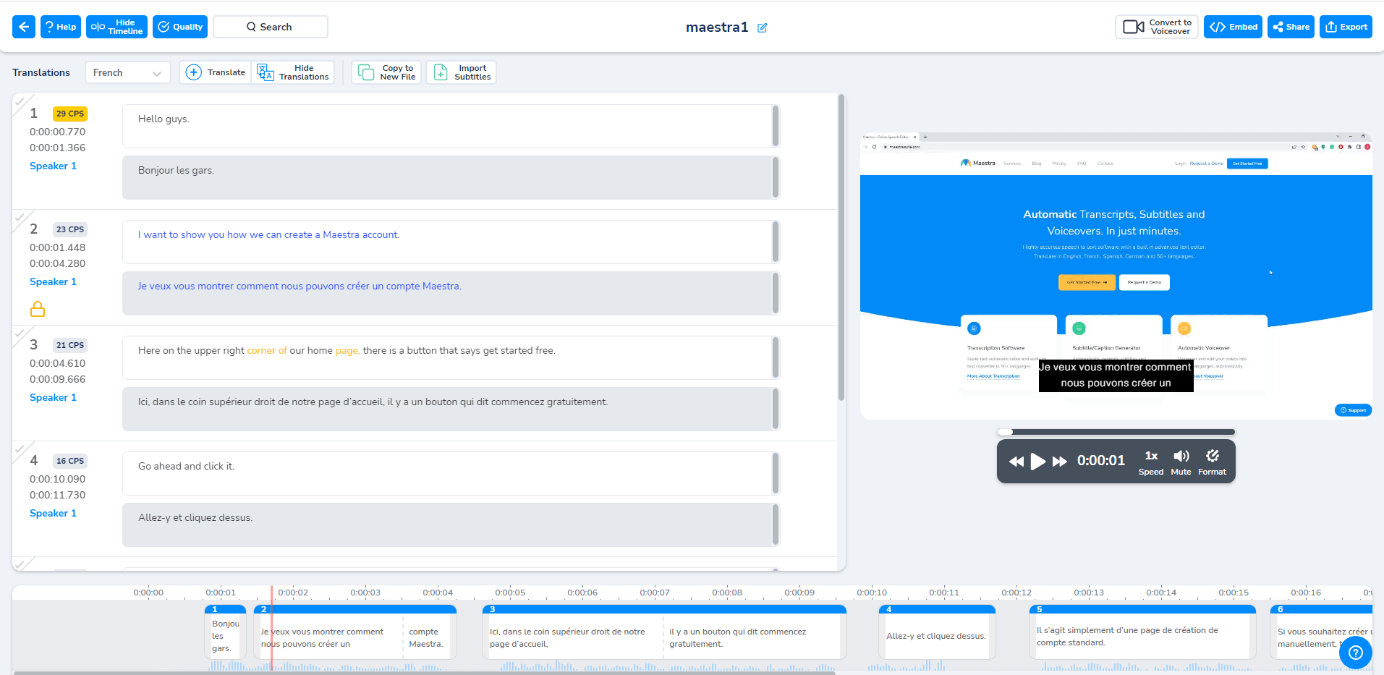
Then the transcription will begin. The transcription roughly lasts around half the duration of the file. After the transcription is done, the subtitles will be added automatically.
Now you can start editing the subtitles! If you want to learn how to edit subtitles with Maestra, click here.